Connecting Checkout Champ
Send order and revenue data from Checkout Champ back into Clarflow, so the sales your funnel drives show up on its analytics page.
Unlike most Clarflow integrations there is no OAuth and no API key. Checkout Champ pushes to you: you create an Export Webhook (Postback) profile in Checkout Champ, point it at a URL Clarflow generates, and tell it which fields to send.
Prerequisites
- A Checkout Champ account with admin access
- A Clarflow funnel whose exit link sends visitors to your Checkout Champ checkout
- About 10 minutes
Step 1: Create the connection in Clarflow
In Clarflow open Settings → Integrations, find the Checkout Champ card and click Connect. Give it a name you'll recognise later — the store or offer it belongs to.
Clarflow generates two things you'll need in a moment:
- a Postback URL
- a Field Mappings table, including a connection id (
cid) and a secret token
Leave this modal open. Everything you paste into Checkout Champ comes from here.
Treat the token like a password. It is the only thing authenticating your postbacks. Anyone who has it can push fake orders into your analytics. Don't paste it into a shared doc or a support ticket.
Step 2: Create a Postback profile in Checkout Champ
In Checkout Champ go to Admin → Export.
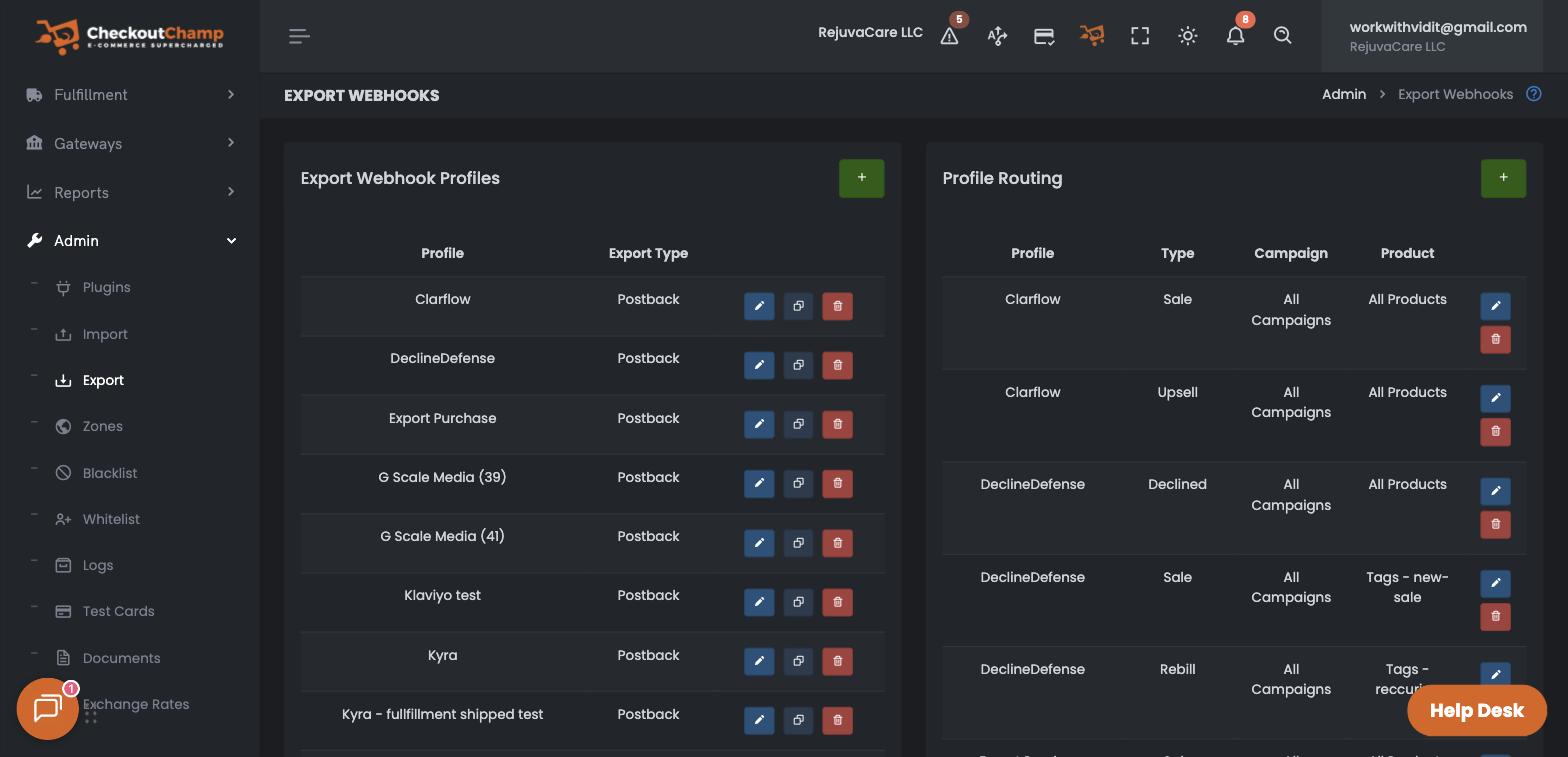
This screen has two panels that work together, and you need both:
- Export Webhook Profiles — what gets sent
- Profile Routing — when it gets sent
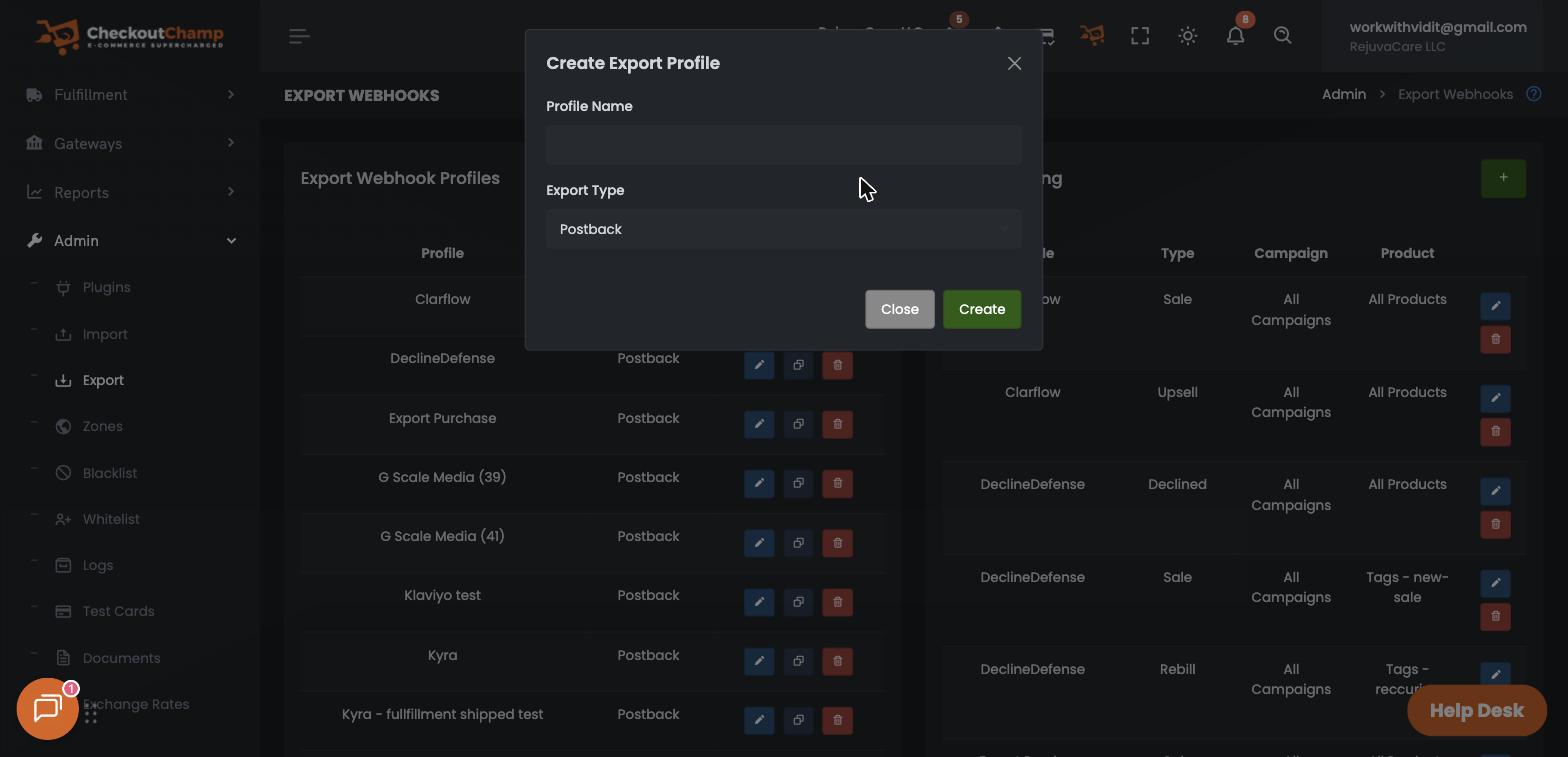
Click the green + on the Export Webhook Profiles panel. Name the profile Clarflow and set Export Type to Postback.
Step 3: Paste the Postback URL — and nothing else
Open the profile you just created. In Postback URL, paste the URL from the Clarflow modal exactly as-is:
https://www.clarflow.com/api/integrations/checkout-champ/postback
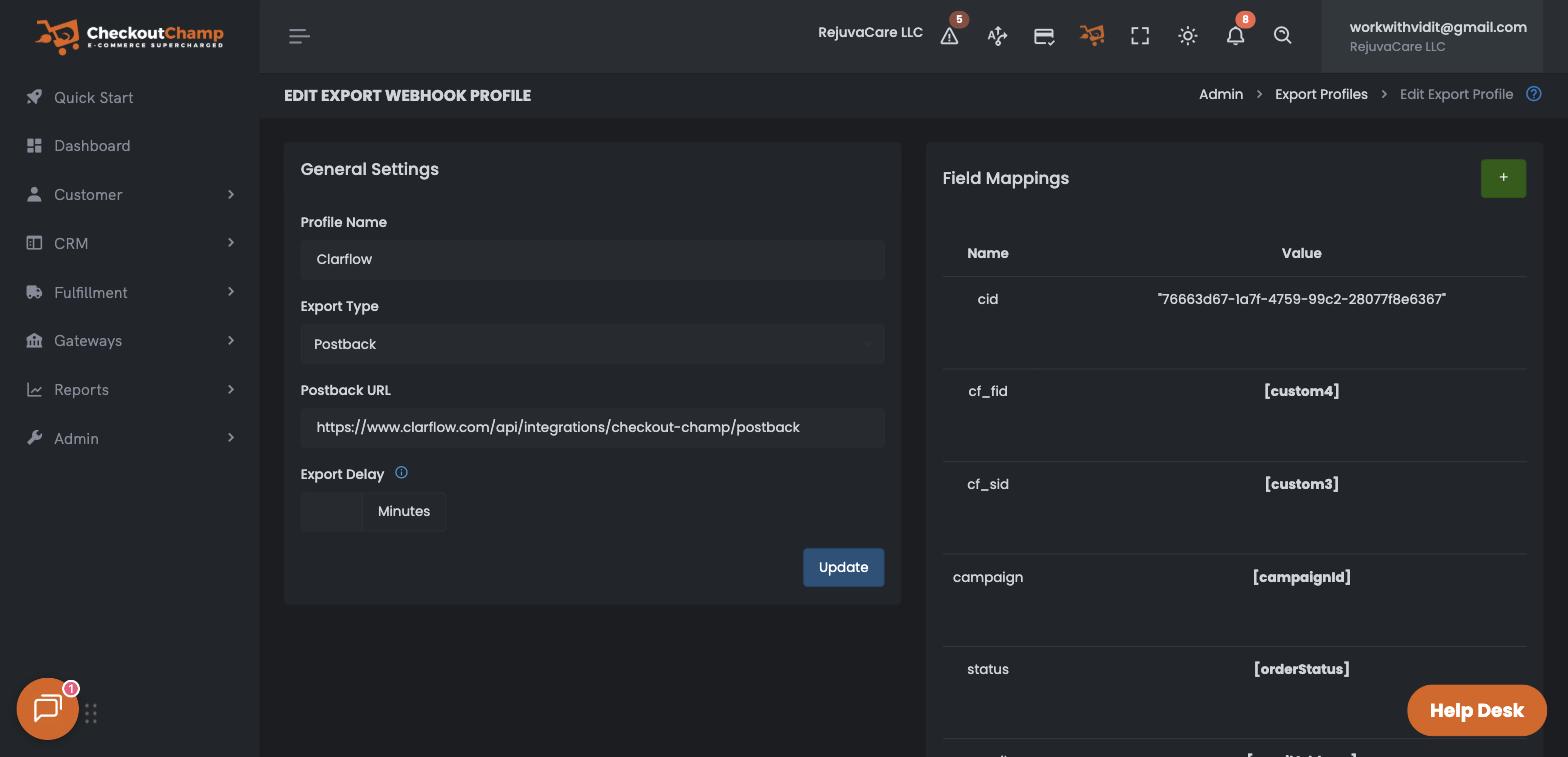
The URL must not have a query string on it. Checkout Champ builds the query string itself from the field mappings you add next, and appends it to whatever is in this box. A URL that already ends in
?something=valuegets mangled and every postback fails.
Step 4: Add the field mappings
Each mapping is one query parameter Checkout Champ will send. Click the green + on the Field Mappings panel to add each row.
There are two kinds of row.
Static rows — for values that never change, like your connection id and token. Leave Field on Static and type the value into Static Value.
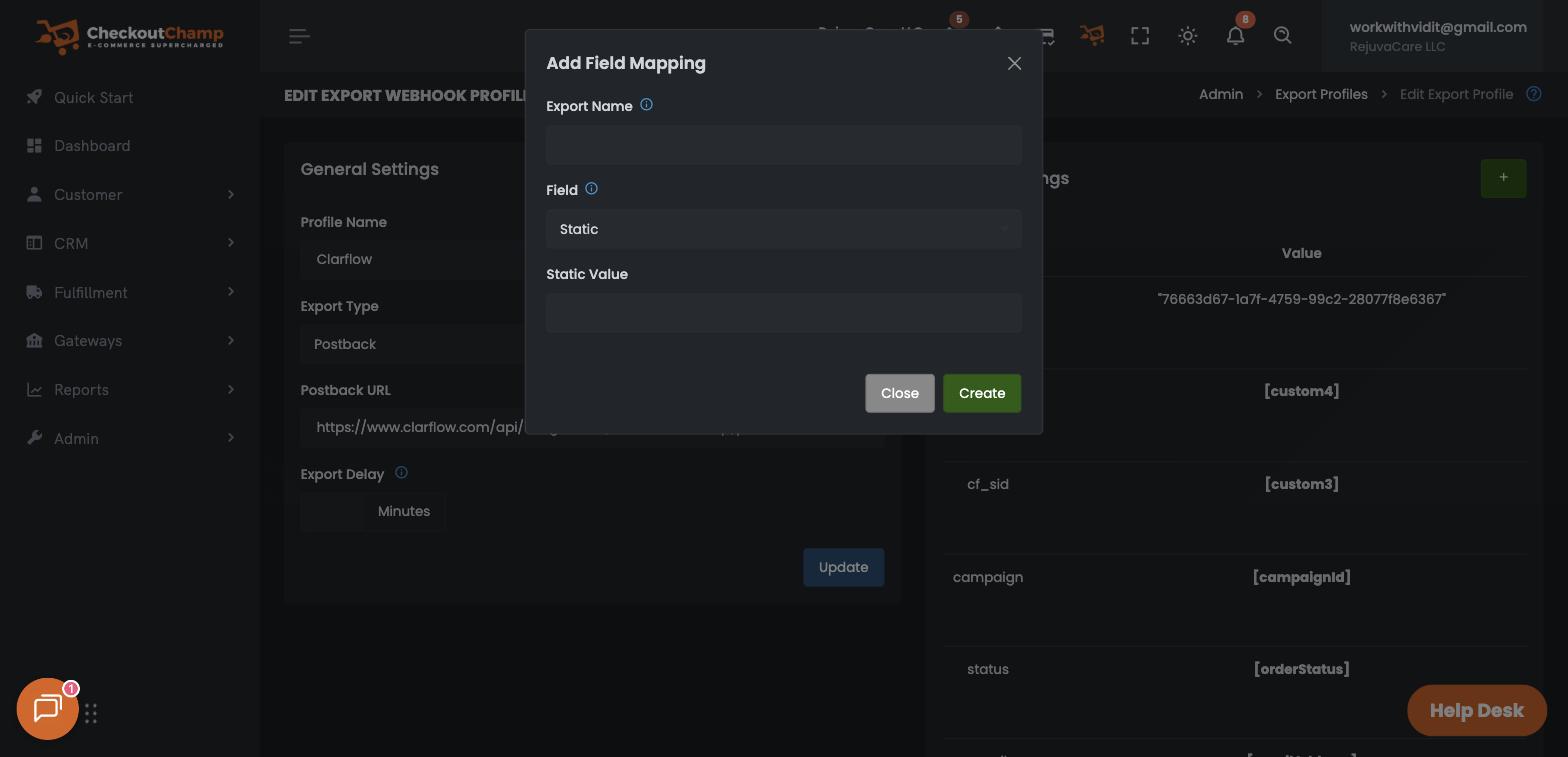
Field rows — for values that come from the order. Pick the Checkout Champ field from the Field dropdown; the Static Value box disappears once you do.
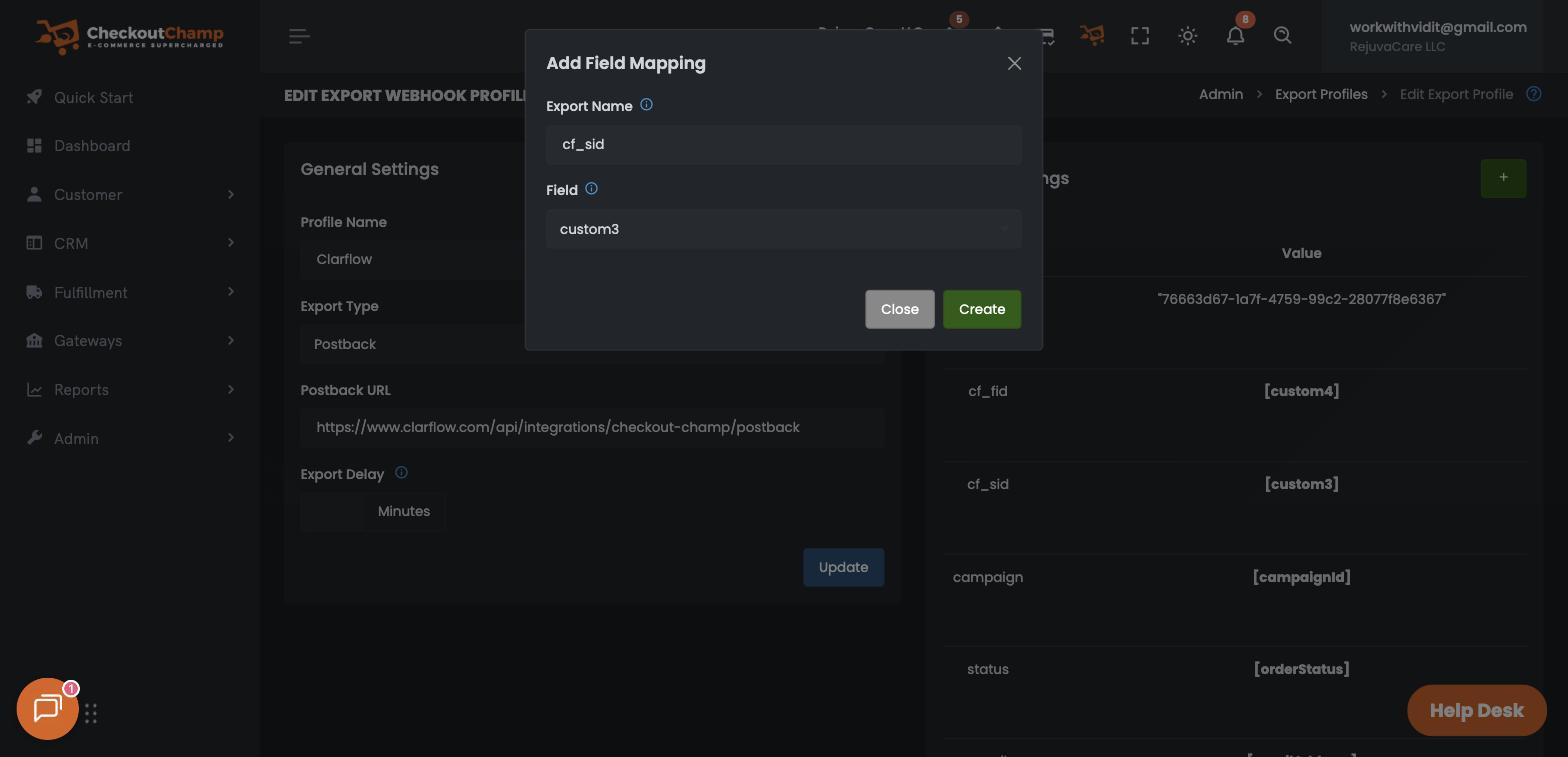
Add all eleven rows. Export Name must match exactly — that's the parameter name Clarflow reads:
| Export Name | Field | Notes |
|---|---|---|
cid | Static → your connection id | Identifies your connection |
token | Static → your token | Authenticates the postback |
order_id | orderId | Required |
total | orderTotal | Required |
currency | currencyCode | Defaults to USD if omitted |
email | emailAddress | Optional |
status | orderStatus | Recommended — used to exclude refunds |
campaign | campaignId | Optional |
cf_sid | custom3 | Funnel attribution |
cf_fid | custom4 | Funnel attribution |
cf_wid | custom5 | Funnel attribution |
When you're done it should look like this:
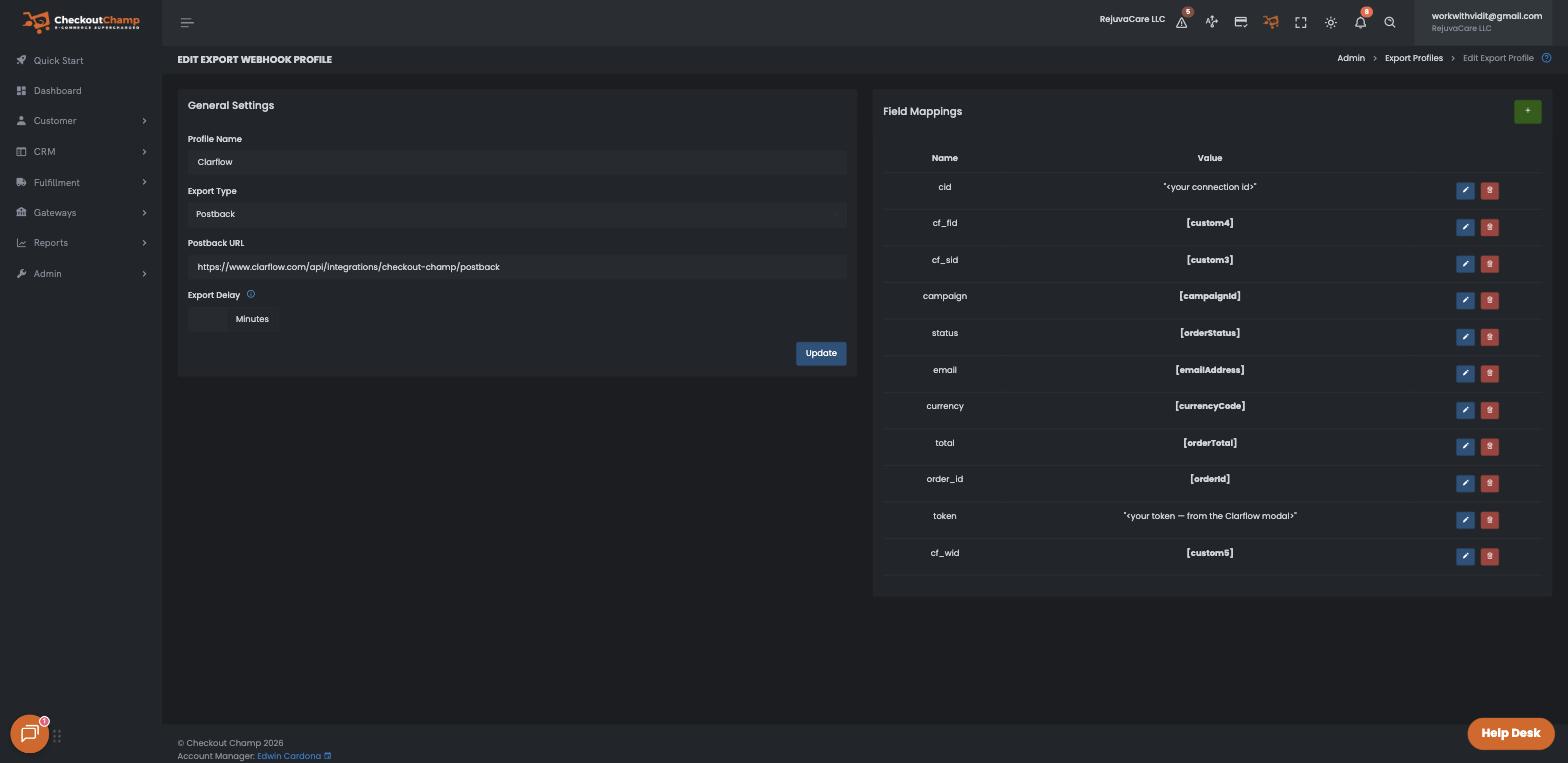
Use
custom3–custom5, notcustom1/custom2. Checkout Champ's own documentation describescustom1as the CheckoutChamp Funnel Name andcustom2as the Page Name, so those two slots may already be in use.
Step 5: Route the profile to real sales
This is the step that actually turns the webhook on. A profile with no routing rows is configured but inert — it will never fire, no matter how correct the mappings are.
Click the green + on the Profile Routing panel.
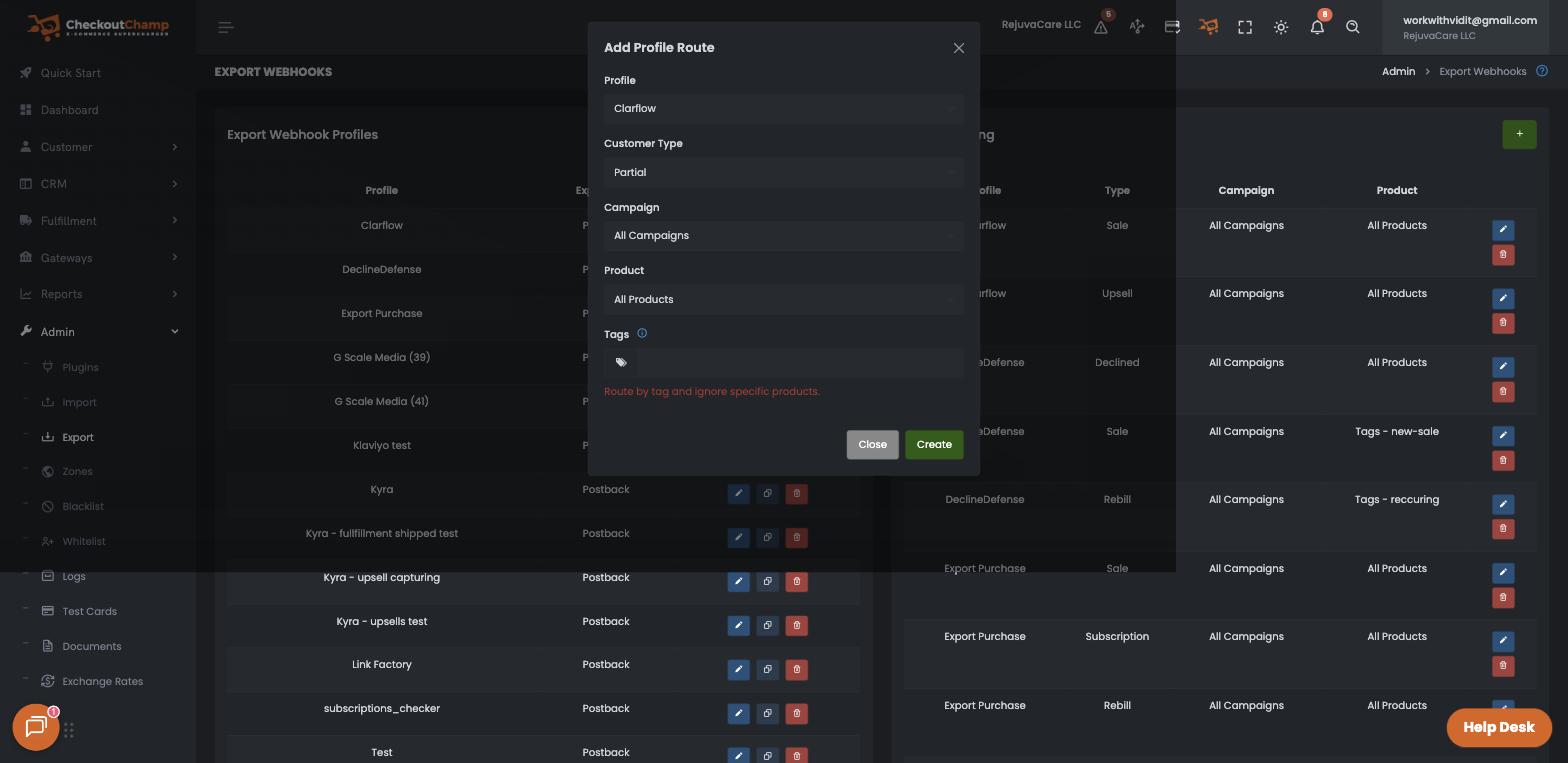
Note that Customer Type defaults to Partial — change it. A partial is an abandoned checkout: no order id, no total, nothing to record.
Set Customer Type to New Sale, leave Campaign and Product on All, and click Create.
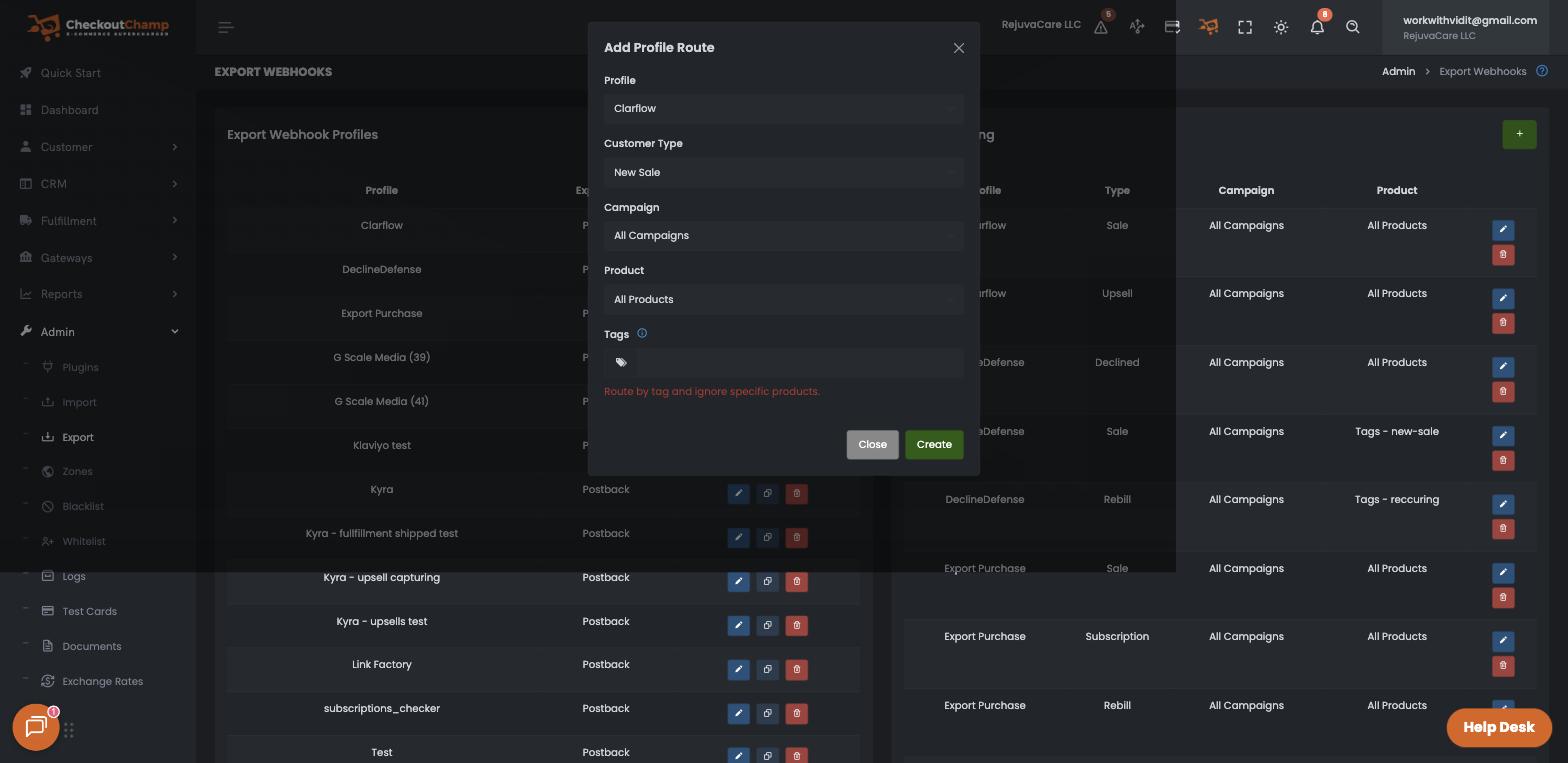
Then repeat once more with Customer Type = Upsell, so post-purchase upsells are counted too.
You should end up with exactly two routing rows for the Clarflow profile:
| Profile | Type | Campaign | Product |
|---|---|---|---|
| Clarflow | Sale | All Campaigns | All Products |
| Clarflow | Upsell | All Campaigns | All Products |
Step 6: Verify with a real order
Place one genuine order through the funnel.
Test Card orders never fire a postback. Checkout Champ excludes them from the webhook system entirely, so a test order will tell you nothing. It has to be a real one.
Back in Clarflow, the Checkout Champ card flips from Waiting for first order to Receiving orders once the first postback lands.
If nothing arrives, check in this order:
- Profile Routing has at least one row for the Clarflow profile — by far the most common cause
- The Postback URL has no query string
cidandtokenare Static rows and match the Clarflow modal- Admin → Logs in Checkout Champ shows the exact URL that fired, including which values were substituted
How funnel attribution works
Order and revenue tracking works as soon as postbacks arrive. Tying each order to a specific funnel needs one more link in the chain.
When a visitor leaves your funnel through an exit link, Clarflow appends tracking values to the destination URL. Checkout Champ stores those values on the order, and the cf_sid / cf_fid / cf_wid mappings above read them back out.
Two things this depends on:
- The funnel must be republished after connecting, so its exit links carry the tracking values.
- Traffic must actually flow through the funnel into Checkout Champ. Orders that reach your store another way are still recorded — they just aren't credited to a funnel.
Orders that arrive without these values are counted in your store totals but won't appear against an individual funnel.
What gets counted as revenue
Checkout Champ exports on status changes, not just at order creation — so a decline or a refund arrives through the same postback as the original sale.
Clarflow excludes non-revenue statuses (declines, refunds, cancellations, chargebacks) from funnel revenue automatically. You don't need to configure anything, but it's worth knowing why the revenue in Clarflow can be slightly lower than a raw order count in Checkout Champ.
This is also why mapping status is recommended rather than optional.